Tuesday, April 5, 2016

(Documentation) MDFostrap Material Design Template Blogger

Documentation for MDFostrap Blogger Template. MDFostrap is a simple & clean designed with material design style and with a great responsive design.
MDFostrap documentation

1. Header

material design header

  • Change The Small Menu

small header material design

Search this on HTML Editor first-top 

Then, replace the menu that you want
  • Change The Menu (Desktop)

material design header

Search this on HTML Editor data-activates='dropdown1'

responsive menu material design
Then, replace the menu that you want
  • Change The Menu (Smartphone & Mobile)

material design mobile menu

Search this on HTML Editor id='slide-out'

responsive menu material design mobile
Then, replace your blog title and the menu that you want

2. Subscribe Form

blogger inline edit template

Compare with your script
Copy this script, layout > sidebar > Add a gadget > HTML/Javascript

<div class="container-subscribe card">
    <div class="row">
        <form action="https://feedburner.google.com/fb/a/mailverify" class="col s12" method="post" onsubmit="window.open('https://feedburner.google.com/fb/a/mailverify?uri=Mdfostrap', 'popupwindow', 'scrollbars=yes,width=550,height=520');return true" target="popupwindow">
            <div class="row">
                <div class="input-field col s12">
                    <input class="validate" id="email" name="email" type="email"/>
                    <label data-error="wrong" data-success="right" for="email">
                        Email
                    </label>
                    <input name="uri" type="hidden" value="Mdfostrap"/>
                    <input name="loc" type="hidden" value="en_US"/>
                    <div class="center">
                        <button class="submit btn btn-danger waves-effect waves-red white red-text" type="submit">
                        </button>
                        Subscribe
                    </div>
                </div>
            </div>
        </form>
    </div>
</div>

3. Featured Category (Sort by Label)

featured category material design

4. Lightbox Image

image lightbox material design

  • First, select your image

lightbox material design

  • Then, remove 'Link'

material design light box

Monday, April 4, 2016

Free Material Design Template Blogger - MDFostrap

material design blogspot template

MDFostrap Blogger Templates is a simple & clean designed with material design style and with a great responsive design. "Please don't" use this theme for a blog with a bad niche or AGC Blog

MDFostrap Material Design Template Feature :

  • Responsive Design
  • SEO Friendly
  • Mobile Friendly
  • Breadcrumbs
  • Awesome LightBox
  • Ads Ready
  • Auto Blog Post Summarize
  • Social Share Button
  • Subscribe Form
  • 2 Column
  • Inline Edited
  • CSS3 + HTML Dropdown Menu
  • Featured Category By Label
  • Contact Page
  • Custom Error 404 Page

Inline Edit

blogger inline edit template

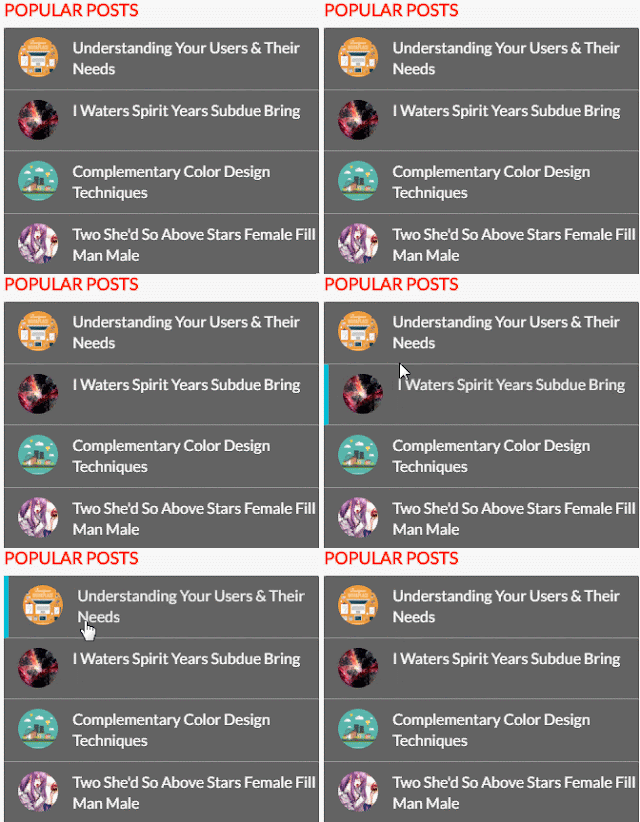
Awesome Popular Posts

popular post material design

Featured Category Recent Post

featured category material design

Responsive Menu

material design responsive menu

Sunday, March 20, 2016

Google Material Design Box Shadow

 material design box shadow css

Fostrap - Material Design is a visual programming language made by Google. Language programming examples using visual display an interesting but simple. Material Design not offer the concept of change in masive, but this is a significant step for the region to Visually Representative language. This technology will trigger design-based artificial manifested into a tangible form.

Before the trend material design "swoop", many designers are trying to make the display (e.g. key/button) using 3D style so that the resulting output resembles how the original form in the real world. But it is no longer popular, thing that becomes the top priority now is the access speed to become one part of material design due to generally give priority to staining a solid objects without imposing the use of images is not necessary.

The term often we call with the flat design that does not give priority to the use of the background is too complicated but simple in order to make the user can more easily and not confused to use those objects.

Material Design Box Shadows

Browser Support All of the major newest browsers support box-shadow property.
  • Internet Explorer 9.0 and higher 
  • Firefox 3.5 and higher 
  • Chrome 1 and higher 
  • Safari 3 and higher 
  • Opera 10.5 and higher

Effect 1

Material Design Box Shadow 1
The HTML
<div class="gmd">
  <!-- your countent -->
</div>
The CSS
.gmd {
  background: #fff;
  border-radius: 2px;
  display: block;
  float: left;
  height: 150px;
  margin: 1rem;
  position: relative;
  width: 150px;
}

 Effect 2

Material Design Box Shadow 2
The HTML
<div class="gmd gmd-1">
  <!-- your countent -->
</div>
The CSS
.gmd {
  background: #fff;
  border-radius: 2px;
  display: block;
  float: left;
  height: 150px;
  margin: 1rem;
  position: relative;
  width: 150px;
}
.gmd-1 {
  -webkit-box-shadow: 0 1px 3px rgba(0, 0, 0, 0.12), 0 1px 2px rgba(0, 0, 0, 0.24);
  -moz-box-shadow: 0 1px 3px rgba(0, 0, 0, 0.12), 0 1px 2px rgba(0, 0, 0, 0.24);
  -ms-box-shadow: 0 1px 3px rgba(0, 0, 0, 0.12), 0 1px 2px rgba(0, 0, 0, 0.24);
  -o-box-shadow: 0 1px 3px rgba(0, 0, 0, 0.12), 0 1px 2px rgba(0, 0, 0, 0.24);
  box-shadow: 0 1px 3px rgba(0, 0, 0, 0.12), 0 1px 2px rgba(0, 0, 0, 0.24);
  -webkit-transition: all 0.25s ease-in-out;
  -moz-transition: all 0.25s ease-in-out;
  -ms-transition: all 0.25s ease-in-out;
  -o-transition: all 0.25s ease-in-out;
  transition: all 0.25s ease-in-out;

Effect 3

Material Design Box Shadow 3 
The HTML
<div class="gmd gmd-2">
  <!-- your countent -->
</div>
The CSS
.gmd {
  background: #fff;
  border-radius: 2px;
  display: block;
  float: left;
  height: 150px;
  margin: 1rem;
  position: relative;
  width: 150px;
}
.gmd-2 {
  -webkit-box-shadow: 0 3px 6px rgba(0, 0, 0, 0.16), 0 3px 6px rgba(0, 0, 0, 0.23);
  -moz-box-shadow: 0 3px 6px rgba(0, 0, 0, 0.16), 0 3px 6px rgba(0, 0, 0, 0.23);
  -ms-box-shadow: 0 3px 6px rgba(0, 0, 0, 0.16), 0 3px 6px rgba(0, 0, 0, 0.23);
  -o-box-shadow: 0 3px 6px rgba(0, 0, 0, 0.16), 0 3px 6px rgba(0, 0, 0, 0.23);
  box-shadow: 0 3px 6px rgba(0, 0, 0, 0.16), 0 3px 6px rgba(0, 0, 0, 0.23);

Effect 4

Material Design Box Shadow 4
The HTML
<div class="gmd gmd-3">
  <!-- your countent -->
</div>
The CSS
.gmd {
  background: #fff;
  border-radius: 2px;
  display: block;
  float: left;
  height: 150px;
  margin: 1rem;
  position: relative;
  width: 150px;
}
.gmd-3 {
  -webkit-box-shadow: 0 10px 20px rgba(0, 0, 0, 0.19), 0 6px 6px rgba(0, 0, 0, 0.23);
  -moz-box-shadow: 0 10px 20px rgba(0, 0, 0, 0.19), 0 6px 6px rgba(0, 0, 0, 0.23);
  -ms-box-shadow: 0 10px 20px rgba(0, 0, 0, 0.19), 0 6px 6px rgba(0, 0, 0, 0.23);
  -o-box-shadow: 0 10px 20px rgba(0, 0, 0, 0.19), 0 6px 6px rgba(0, 0, 0, 0.23);
  box-shadow: 0 10px 20px rgba(0, 0, 0, 0.19), 0 6px 6px rgba(0, 0, 0, 0.23);
}

 Effect 5

Material Design Box Shadow 5
The HTML
<div class="gmd gmd-4">
  <!-- your countent -->
</div>
The CSS
.gmd {
  background: #fff;
  border-radius: 2px;
  display: block;
  float: left;
  height: 150px;
  margin: 1rem;
  position: relative;
  width: 150px;
}
.gmd-4 {
  -webkit-box-shadow: 0 14px 28px rgba(0, 0, 0, 0.25), 0 10px 10px rgba(0, 0, 0, 0.22);
  -moz-box-shadow: 0 14px 28px rgba(0, 0, 0, 0.25), 0 10px 10px rgba(0, 0, 0, 0.22);
  -ms-box-shadow: 0 14px 28px rgba(0, 0, 0, 0.25), 0 10px 10px rgba(0, 0, 0, 0.22);
  -o-box-shadow: 0 14px 28px rgba(0, 0, 0, 0.25), 0 10px 10px rgba(0, 0, 0, 0.22);
  box-shadow: 0 14px 28px rgba(0, 0, 0, 0.25), 0 10px 10px rgba(0, 0, 0, 0.22);

Effect 6 

Material Design Box Shadow 6
The HTML
<div class="gmd gmd-5">
  <!-- your countent -->
</div>
The CSS
.gmd {
  background: #fff;
  border-radius: 2px;
  display: block;
  float: left;
  height: 150px;
  margin: 1rem;
  position: relative;
  width: 150px;
}
.gmd-5 {
  -webkit-box-shadow: 0 19px 38px rgba(0, 0, 0, 0.30), 0 15px 12px rgba(0, 0, 0, 0.22);
  -moz-box-shadow: 0 19px 38px rgba(0, 0, 0, 0.30), 0 15px 12px rgba(0, 0, 0, 0.22);
  -ms-box-shadow: 0 19px 38px rgba(0, 0, 0, 0.30), 0 15px 12px rgba(0, 0, 0, 0.22);
  -o-box-shadow: 0 19px 38px rgba(0, 0, 0, 0.30), 0 15px 12px rgba(0, 0, 0, 0.22);
  box-shadow: 0 19px 38px rgba(0, 0, 0, 0.30), 0 15px 12px rgba(0, 0, 0, 0.22);
}

Sunday, March 13, 2016

30+ Bootstrap Modal Animation Effects with Material Design Style

bootstrap modal animation

Fostrap - The modal plugin is dialog box / popup that make a page focused on one section / box.
Today, I want to tutorial and share code snippets Bootstrap Modal Animation Effects Example with Material Design Style. Very much effect that FadeIn, Flip, Slide Down, Slide Up, etc.

First, setting BootstrapJQuery, and Velocity.js

<link rel='stylesheet' href='https://maxcdn.bootstrapcdn.com/bootstrap/3.3.5/css/bootstrap.min.css'>
<script src='http://cdnjs.cloudflare.com/ajax/libs/jquery/2.1.3/jquery.min.js'></script>
<script src='http://maxcdn.bootstrapcdn.com/bootstrap/3.3.5/js/bootstrap.min.js'></script>
<script src='https://cdnjs.cloudflare.com/ajax/libs/velocity/1.2.2/velocity.min.js'></script>
<script src='https://cdnjs.cloudflare.com/ajax/libs/velocity/1.2.2/velocity.ui.min.js'></script>

You can copy Modal Dialog that you want, example :

I Want Modal Animation Effects Fade In

Just copy script that you already download, just search class .fadeIn, see screenshot above :

bootstrap modal fade In

Then, copy The Javascript

$(".modal").each(function(l){$(this).on("show.bs.modal",function(l){var o=$(this).attr("data-easein");"shake"==o?$(".modal-dialog").velocity("callout."+o):"pulse"==o?$(".modal-dialog").velocity("callout."+o):"tada"==o?$(".modal-dialog").velocity("callout."+o):"flash"==o?$(".modal-dialog").velocity("callout."+o):"bounce"==o?$(".modal-dialog").velocity("callout."+o):"swing"==o?$(".modal-dialog").velocity("callout."+o):$(".modal-dialog").velocity("transition."+o)})});

If you want to change with Material Design Style, copy The CSS below :
.modal-content {
  border: none;
  border-radius: 2px;
      box-shadow: 0 16px 28px 0 rgba(0,0,0,0.22),0 25px 55px 0 rgba(0,0,0,0.21);
}
.modal-header{
  border-bottom: 0;
  padding-top: 15px;
  padding-right: 26px;
  padding-left: 26px;
  padding-bottom: 0px;
}
.modal-title {
  font-size: 34px;
}
.modal-body{
  border-bottom: 0;
  padding-top: 5px;
  padding-right: 26px;
  padding-left: 26px;
  padding-bottom: 10px;
  font-size: 15px;
}
.modal-footer {
  border-top:0;
  padding-top: 0px;
  padding-right:26px;
  padding-bottom:26px;
  padding-left:26px;
}
.btn-default,.btn-primary {
    border: none;
    border-radius: 2px;
    display: inline-block;
    color: #424242;
    background-color: #FFF;
    text-align: center;
    height: 36px;
    line-height: 36px;
    outline: 0;
    padding: 0 2rem;
    vertical-align: middle;
    -webkit-tap-highlight-color: transparent;
    box-shadow: 0 2px 5px 0 rgba(0,0,0,0.16),0 2px 10px 0 rgba(0,0,0,0.12);
    letter-spacing: .5px;
    transition: .2s ease-out;
}
.btn-default:hover{
  background-color: #FFF;
  box-shadow: 0 5px 11px 0 rgba(0,0,0,0.18),0 4px 15px 0 rgba(0,0,0,0.15);
}
.btn-primary {
  color: #FFF;
  background-color: #2980B9;
}
.btn-primary:hover{
  background-color: #2980B9;
  box-shadow: 0 5px 11px 0 rgba(0,0,0,0.18),0 4px 15px 0 rgba(0,0,0,0.15);
}

Saturday, March 12, 2016

Customize Bootstrap Accordion With Arrow


Fostrap - Collapse is flexible plugin that utilizes a handful of classes for easy toggle behavior. Today, I want to share code snippets bootstrap accordion / collapse with arrow. I made 2 version, Light and Dark. And arrows that I use is Font Awesome


1. Light Version Bootstrap Accordion Collapse With Arrow

bootstrap accordion arrow

First, setting bootstrap and JQuery, you can use Bootstrap CDN Links

<link href="https://maxcdn.bootstrapcdn.com/bootstrap/3.3.6/css/bootstrap.min.css" rel="stylesheet">
<script src="https://code.jquery.com/jquery-2.2.1.min.js"></script>
<script src="https://maxcdn.bootstrapcdn.com/bootstrap/3.3.6/js/bootstrap.min.js"></script>

1. The HTML

<link rel="stylesheet" href="https://maxcdn.bootstrapcdn.com/font-awesome/4.5.0/css/font-awesome.min.css"/>
<div class="panel-group" id="accordion" role="tablist" aria-multiselectable="true">
        <div class="panel panel-light">
            <div class="panel-heading" role="tab" id="headingOne">
                <h4 class="panel-title">
                    <a role="button" data-toggle="collapse" data-parent="#accordion" href="#collapseOne" aria-expanded="true" aria-controls="collapseOne">
                        <i class="indicator fa fa-caret-right">
                        </i>
                        Collapsible Group Item #1
                    </a>
                </h4>
            </div>
            <div id="collapseOne" class="panel-collapse collapse" role="tabpanel" aria-labelledby="headingOne">
                <div class="panel-body">
                    Liebe ist eine Frucht der Gefühle die starke Zuneigung und persönlichen Interessen. Im Zusammenhang mit der Philosophie der Liebe, die geerbt die Natur des guten Yg das ganze Gefühl der Güte, Mitgefühl und Zuneigung.
                </div>
            </div>
        </div>
        <div class="panel panel-light">
            <div class="panel-heading" role="tab" id="headingTwo">
                <h4 class="panel-title">
                    <a class="collapsed" role="button" data-toggle="collapse" data-parent="#accordion" href="#collapseTwo" aria-expanded="false" aria-controls="collapseTwo">
                        <i class="indicator fa fa-caret-right">
                        </i>
                        Collapsible Group Item #2
                    </a>
                </h4>
            </div>
            <div id="collapseTwo" class="panel-collapse collapse" role="tabpanel" aria-labelledby="headingTwo">
                <div class="panel-body">
                    Liebe ist eine Frucht der Gefühle die starke Zuneigung und persönlichen Interessen. Im Zusammenhang mit der Philosophie der Liebe, die geerbt die Natur des guten Yg das ganze Gefühl der Güte, Mitgefühl und Zuneigung.
                </div>
            </div>
        </div>
        <div class="panel panel-light">
            <div class="panel-heading" role="tab" id="headingThree">
                <h4 class="panel-title">
                    <a class="collapsed" role="button" data-toggle="collapse" data-parent="#accordion" href="#collapseThree" aria-expanded="false" aria-controls="collapseThree">
                        <i class="indicator fa fa-caret-right">
                        </i>
                        Collapsible Group Item #3
                    </a>
                </h4>
            </div>
            <div id="collapseThree" class="panel-collapse collapse" role="tabpanel" aria-labelledby="headingThree">
                <div class="panel-body">
                    Liebe ist eine Frucht der Gefühle die starke Zuneigung und persönlichen Interessen. Im Zusammenhang mit der Philosophie der Liebe, die geerbt die Natur des guten Yg das ganze Gefühl der Güte, Mitgefühl und Zuneigung.
                </div>
            </div>
        </div>
    </div>

2. The CSS

/********************/
/* Panel light color */
/********************/
.panel-light {
    background: #E0E0E0;
    border: 0;
    border-radius: 0 !important;
    box-shadow: 0px 0px 0px transparent;
    color: #000;
    margin-top:0;
}
.panel-light .panel-heading {
    padding: 0;
}
.panel-light .panel-light {
    background: #E0E0E0;
}
.panel-light .panel-body {
    border-color: rgba(255, 255, 255, 0.10) !important;
    border-top: 1px solid rgba(255, 255, 255, 0.10) !important;
    box-shadow: 0px -1px 0px #BDBDBD;
}
.panel-light .panel-title > a {
    color: #000;
    display: block;
    padding: 10px 15px;
    text-decoration: none !important;
}
.panel-light .panel-title > a:hover {
    background: rgba(0, 0, 0, 0.1);
}
.panel-light .panel-title > a:focus {
    outline: none;
}

3. The Javascript

  function toggleChevron(e) {
    $(e.target)
        .prev('.panel-heading')
        .find("i.indicator")
        .toggleClass('fa-caret-right fa-caret-down');
}
  $('#accordion').on('hidden.bs.collapse', toggleChevron);
  $('#accordion').on('shown.bs.collapse', toggleChevron);
  $('#accordion2').on('hidden.bs.collapse', toggleChevron);
  $('#accordion2').on('shown.bs.collapse', toggleChevron);

2. Dark Version Bootstrap Accordion With Arrow

bootstrap accordion active

First, setting bootstrap and JQuery, you can use Bootstrap CDN Links

<link href="https://maxcdn.bootstrapcdn.com/bootstrap/3.3.6/css/bootstrap.min.css" rel="stylesheet">
<script src="https://code.jquery.com/jquery-2.2.1.min.js"></script>
<script src="https://maxcdn.bootstrapcdn.com/bootstrap/3.3.6/js/bootstrap.min.js"></script>

1. The HTML

<link rel="stylesheet" href="https://maxcdn.bootstrapcdn.com/font-awesome/4.5.0/css/font-awesome.min.css"/>
<div class="panel-group" id="accordion2" role="tablist" aria-multiselectable="true">
        <div class="panel panel-dark">
            <div class="panel-heading" role="tab" id="headingOneDark">
                <h4 class="panel-title">
                    <a role="button" data-toggle="collapse" data-parent="#accordion2" href="#collapseOneDark" aria-expanded="true" aria-controls="collapseOneDark">
                        <i class="indicator fa fa-caret-right">
                        </i>
                        Collapsible Group Item #1
                    </a>
                </h4>
            </div>
            <div id="collapseOneDark" class="panel-collapse collapse" role="tabpanel" aria-labelledby="headingOneDark">
                <div class="panel-body">
                    Liebe ist eine Frucht der Gefühle die starke Zuneigung und persönlichen Interessen. Im Zusammenhang mit der Philosophie der Liebe, die geerbt die Natur des guten Yg das ganze Gefühl der Güte, Mitgefühl und Zuneigung.
                </div>
            </div>
        </div>
        <div class="panel panel-dark">
            <div class="panel-heading" role="tab" id="headingTwoDark">
                <h4 class="panel-title">
                    <a class="collapsed" role="button" data-toggle="collapse" data-parent="#accordion2" href="#collapseTwoDark" aria-expanded="false" aria-controls="collapseTwoDark">
                        <i class="indicator fa fa-caret-right">
                        </i>
                        Collapsible Group Item #2
                    </a>
                </h4>
            </div>
            <div id="collapseTwoDark" class="panel-collapse collapse" role="tabpanel" aria-labelledby="headingTwoDark">
                <div class="panel-body">
                    Liebe ist eine Frucht der Gefühle die starke Zuneigung und persönlichen Interessen. Im Zusammenhang mit der Philosophie der Liebe, die geerbt die Natur des guten Yg das ganze Gefühl der Güte, Mitgefühl und Zuneigung.
                </div>
            </div>
        </div>
        <div class="panel panel-dark">
            <div class="panel-heading" role="tab" id="headingThreeDark">
                <h4 class="panel-title">
                    <a class="collapsed" role="button" data-toggle="collapse" data-parent="#accordion2" href="#collapseThreeDark" aria-expanded="false" aria-controls="collapseThreeDark">
                        <i class="indicator fa fa-caret-right">
                        </i>
                        Collapsible Group Item #3
                    </a>
                </h4>
            </div>
            <div id="collapseThreeDark" class="panel-collapse collapse" role="tabpanel" aria-labelledby="headingThreeDark">
                <div class="panel-body">
                    Liebe ist eine Frucht der Gefühle die starke Zuneigung und persönlichen Interessen. Im Zusammenhang mit der Philosophie der Liebe, die geerbt die Natur des guten Yg das ganze Gefühl der Güte, Mitgefühl und Zuneigung.
                </div>
            </div>
        </div>
    </div>

2. The CSS

/********************/
/* Panel dark color */
/********************/
.panel-dark {
    background: #424242;
    border: 0;
    border-radius: 0 !important;
    box-shadow: 0px 0px 0px transparent;
    color: #FFF;
    margin-top:0;
}
.panel-dark .panel-heading {
    padding: 0;
}
.panel-dark .panel-dark {
    background: #616161;
}
.panel-dark .panel-body {
    border-color: rgba(255, 255, 255, 0.10) !important;
    border-top: 1px solid rgba(255, 255, 255, 0.10) !important;
    box-shadow: 0px -1px 0px #212121;
}
.panel-dark .panel-title > a {
    color: #FFF;
    display: block;
    padding: 10px 15px;
    text-decoration: none !important;
}
.panel-dark .panel-title > a:hover {
    background: rgba(0, 0, 0, 0.1);
}
.panel-dark .panel-title > a:focus {
    outline: none;
}

3. The Javascript

  function toggleChevron(e) {
    $(e.target)
        .prev('.panel-heading')
        .find("i.indicator")
        .toggleClass('fa-caret-right fa-caret-down');
}
  $('#accordion').on('hidden.bs.collapse', toggleChevron);
  $('#accordion').on('shown.bs.collapse', toggleChevron);
  $('#accordion2').on('hidden.bs.collapse', toggleChevron);
  $('#accordion2').on('shown.bs.collapse', toggleChevron);

Thursday, March 10, 2016

Bootstrap 3 Outline Buttons Snippet

bootstrap 3 outline button

First, setting bootstrap, you can use Bootstrap CDN Links

<link href="https://maxcdn.bootstrapcdn.com/bootstrap/3.3.6/css/bootstrap.min.css" rel="stylesheet">
<script src="https://maxcdn.bootstrapcdn.com/bootstrap/3.3.6/js/bootstrap.min.js"></script>

Second, setup The HTML

<div class="container">
<div class="row">
<h2>
Bootstrap Outline Buttons</h2>
Add the class <code>.outline</code> to any Bootstrap button style.<br />
<a class="btn btn-primary outline" href="https://www.blogger.com/null">Primary Button</a>
            <a class="btn btn-success outline" href="http://www.fostrap.com/">Success Button</a>
            <a class="btn btn-warning outline" href="http://www.fostrap.com/">Warning Button</a>
            <a class="btn btn-danger outline" href="http://www.fostrap.com/">Danger Button</a>
            <a class="btn btn-default outline" href="http://www.fostrap.com/">Default Button</a>
            <br />
<h3>
Button Sizes</h3>
<a class="btn btn-primary outline btn-lg" href="http://www.fostrap.com/">Large Button</a>
            <a class="btn btn-success outline btn-sm" href="http://www.fostrap.com/">Small Button</a>
            <a class="btn btn-danger outline btn-xs" href="http://www.fostrap.com/">Extra Small Button</a>
        </div>
</div>

Then, setup The CSS

body {
  background-color : #ecf0f1
}
.outline {
    background-color: transparent;
    color: inherit;
    transition: all .25s;
}
.btn-primary.outline {
    color: #428bca;
}
.btn-success.outline {
    color: #5cb85c;
}
.btn-info.outline {
    color: #5bc0de;
}
.btn-warning.outline {
    color: #f0ad4e;
}
.btn-danger.outline {
    color: #d9534f;
}
.btn-primary.outline:hover,
.btn-success.outline:hover,
.btn-info.outline:hover,
.btn-warning.outline:hover,
.btn-danger.outline:hover {
    color: #fff;
}

Wednesday, March 9, 2016

Tutorial Styling Responsive Table Bootstrap (With Dark Color)

bootstrap style table css

First, setting bootstrap, you can use Bootstrap CDN Links

<link href="https://maxcdn.bootstrapcdn.com/bootstrap/3.3.6/css/bootstrap.min.css" rel="stylesheet">
<script src="https://maxcdn.bootstrapcdn.com/bootstrap/3.3.6/js/bootstrap.min.js"></script>

Second, setup The HTML

<div class="row">
    <div class="col-md-4 col-md-offset-4">
        <div class="table-responsive costum-table-dark">
            <table class="table">
                <thead>
                    <tr>
                        <th width="2%">
                            No
                        </th>
                        <th>
                            First Name
                        </th>
                        <th>
                            Last Name
                        </th>
                        <th>
                            Username
                        </th>
                    </tr>
                </thead>
                <tbody>
                    <tr>
                        <td>
                            1
                        </td>
                        <td>
                            Mark
                        </td>
                        <td>
                            Otto
                        </td>
                        <td>
                            @mdo
                        </td>
                    </tr>
                    <tr>
                        <td>
                            2
                        </td>
                        <td>
                            Jacob
                        </td>
                        <td>
                            Thornton
                        </td>
                        <td>
                            @fat
                        </td>
                    </tr>
                    <tr>
                        <td>
                            3
                        </td>
                        <td>
                            Larry
                        </td>
                        <td>
                            the Bird
                        </td>
                        <td>
                            @twitter
                        </td>
                    </tr>
                    <tr>
                        <td>
                            4
                        </td>
                        <td>
                            Mark
                        </td>
                        <td>
                            Otto
                        </td>
                        <td>
                            @mdo
                        </td>
                    </tr>
                    <tr>
                        <td>
                            5
                        </td>
                        <td>
                            Jacob
                        </td>
                        <td>
                            Thornton
                        </td>
                        <td>
                            @fat
                        </td>
                    </tr>
                    <tr>
                        <td>
                            6
                        </td>
                        <td>
                            Larry
                        </td>
                        <td>
                            the Bird
                        </td>
                        <td>
                            @twitter
                        </td>
                    </tr>
                </tbody>
            </table>
        </div>
    </div>
</div>

Then, setup The CSS

.costum-table-dark .table th {
    padding: 15px 10px !important;
    background-color: #212121;
    color: #EC7149;
    border-top: 0 !important;
    border-bottom: 2px solid #505050 !important;
}
.costum-table-dark .table tr:hover {
    background-color: #3A3A3A;
}
.costum-table-dark .table {
    background: #434242;
    color: #FFF;
}
.costum-table-dark {
    border: 0;
}
.costum-table-dark .table&gt; tbody&gt; tr&gt; td, .costum-table-dark .table&gt; tbody&gt; tr&gt; th, .costum-table-dark .table&gt; tfoot&gt; tr&gt; td, .costum-table-dark .table&gt; tfoot&gt; tr&gt; th, .costum-table-dark .table&gt; thead&gt; tr&gt; td, .costum-table-dark .table&gt; thead&gt; tr&gt; th {
    border-top: 1px solid #505050;
    text-align: left;
}

Sunday, March 6, 2016

Bootstrap Responsive Material Design Card

bootstrap card example

Fostrap - Tutorial make material cards based on bootstrap

First, setting bootstrap, you can use Bootstrap CDN Links

<link href="https://maxcdn.bootstrapcdn.com/bootstrap/3.3.6/css/bootstrap.min.css" rel="stylesheet">
<script src="https://maxcdn.bootstrapcdn.com/bootstrap/3.3.6/js/bootstrap.min.js"></script>

Second, setup The HTML

<div class="container">
    <div class="row">
        <div class="col-xs-12 col-sm-4">
            <div class="card">
                <a class="img-card" href="http://www.fostrap.com/">
                    <img src="--------- YOUR IMAGE URL ----------" />
                </a>
                <br />
                <div class="card-content">
                    <h4 class="card-title">
                        <a href="http://www.fostrap.com/">
                            Your title card
                        </a>
                    </h4>
                    <div class="">
                        Your description card
                    </div>
                </div>
                <div class="card-read-more">
                    <a class="btn btn-link btn-block" href="http://www.fostrap.com/">
                        Read More
                    </a>
                </div>
            </div>
        </div>
    </div>
</div>

Then, setup The CSS

.card {
  display: block;
    margin-bottom: 20px;
    line-height: 1.42857143;
    background-color: #fff;
    border-radius: 2px;
    box-shadow: 0 2px 5px 0 rgba(0,0,0,0.16),0 2px 10px 0 rgba(0,0,0,0.12);
    transition: box-shadow .25s;
}
.card:hover {
  box-shadow: 0 8px 17px 0 rgba(0,0,0,0.2),0 6px 20px 0 rgba(0,0,0,0.19);
}
.img-card {
  width: 100%;
  height:200px;
  border-top-left-radius:2px;
  border-top-right-radius:2px;
  display:block;
    overflow: hidden;
}
.img-card img{
  width: 100%;
  height: 200px;
  object-fit:cover;
  transition: all .25s ease;
}
.card-content {
  padding:15px;
  text-align:left;
}
.card-title {
  margin-top:0px;
  font-weight: 700;
  font-size: 1.65em;
}
.card-title a {
  color: #000;
  text-decoration: none !important;
}
.card-read-more {
  border-top: 1px solid #D4D4D4;
}
.card-read-more a {
  text-decoration: none !important;
  padding:10px;
  font-weight:600;
  text-transform: uppercase
}

Friday, March 4, 2016

5 Free Download Login Form CSS Template

The Login page is contained on a dynamic website. This page is the door leading to the Administrators page, or a user page if his website is the website that require users to have an account.  The existence of the login page is pretty vital considering the usability and interactive with the user. Unlike other website elements, this login form there is not to be read, but to be used directly by filling it.

Stuffing usually consists of a login form email or username and password. Given the importance of this page, we can't design it desultory. Design a nice login page will produce a good User Experience

Well, below fostrap collect 5 templates free login page is ready you use. Please select and download the one you like. You are free to use them on your project. Click the picture for details and downloads.

1. Calm Breeze Login Screen

A pen by Lewi Hussey
free html login form code

2. Login Form Dark Blue

A pen by Miro Karilahti
free login form templates css

3. Flat Login Form

A pen by Andi Tran
free download login form html css

4. Login To Everdwell

A pen by Kaushalya Mandaliya
login form css templates free download

5. Animated Login Form

A pen by Mohamed Boudra
free html code for login form

5 Button Hover Animation Effects CSS3 (With Tutorial)

button hover effects jquery

This time, fostrap would give the tutorials button hover animation, although very much a hover button is very beautiful, but this one is also not less beautiful.

1. Buttons Hover with SVG

button hover effects example

The HTML
<a class="btnfos btnfos-1" href="https://www.blogger.com/null">
   <svg>
      <rect fill="none" height="100%" width="100%" x="0" y="0">
   </rect></svg>
     Hover
</a> 
The CSS

* {
-moz-box-sizing: inherit;
box-sizing: inherit;
-webkit-transition-property: all;
transition-property: all;
-webkit-transition-duration: .6s;
transition-duration: .6s;
-webkit-transition-timing-function: ease;
transition-timing-function: ease;
}
html,
body {
-moz-box-sizing: border-box;
box-sizing: border-box;
height: 100%;
width: 100%;
}
body {
background: #3498db;
}
.btnfos {
color: #fff;
cursor: pointer;
display: block;
font-size: 16px;
font-weight: 400;
line-height: 45px;
max-width: 160px;
margin: 0 auto 2em;
position: relative;
text-transform: uppercase;
vertical-align: middle;
width: 100%;
text-align: center;
}
@media (min-width: 400px) {
.btnfos {
display: inline-block;
margin-right: 2.5em;
}
.btnfos:nth-of-type(even) {
margin-right: 0;
}
}
@media (min-width: 600px) {
.btnfos:nth-of-type(even) {
margin-right: 2.5em;
}
.btnfos:nth-of-type(5) {
margin-right: 0;
}
}
.btnfos-1 {
background: #3498db;
font-weight: 100;
}
.btnfos-1 svg {
position: absolute;
left: 0;
top: 0;
width: 100%;
height: 45px;
}
.btnfos-1 rect {
fill: none;
stroke: #fff;
stroke-width: 1;
stroke-dasharray: 422, 0;
}
.btnfos-1:hover {
background: rgba(225, 51, 45, 0);
letter-spacing: 1px;
font-weight: 900;
}
.btnfos-1:hover rect {
stroke-width: 5;
stroke-dasharray: 15, 310;
stroke-dashoffset: 48;
-webkit-transition: all 1.35s cubic-bezier(0.19, 1, 0.22, 1);
transition: all 1.35s cubic-bezier(0.19, 1, 0.22, 1);
}

2. Button Action CSS 3

button hover effects css code

The HTML
<a class="btnfos btnfos-2" href="">Hover</a>
  The CSS

* {
-moz-box-sizing: inherit;
box-sizing: inherit;
-webkit-transition-property: all;
transition-property: all;
-webkit-transition-duration: .6s;
transition-duration: .6s;
-webkit-transition-timing-function: ease;
transition-timing-function: ease;
}
html,
body {
-moz-box-sizing: border-box;
box-sizing: border-box;
height: 100%;
width: 100%;
}
body {
background: #3498db;
}
.btnfos {
color: #fff;
cursor: pointer;
display: block;
font-size: 16px;
font-weight: 400;
line-height: 45px;
max-width: 160px;
margin: 0 auto 2em;
position: relative;
text-transform: uppercase;
vertical-align: middle;
width: 100%;
text-align: center;
}
@media (min-width: 400px) {
.btnfos {
display: inline-block;
margin-right: 2.5em;
}
.btnfos:nth-of-type(even) {
margin-right: 0;
}
}
@media (min-width: 600px) {
.btnfos:nth-of-type(even) {
margin-right: 2.5em;
}
.btnfos:nth-of-type(5) {
margin-right: 0;
}
}
.btnfos-2 {
letter-spacing: 0;
}
.btnfos-2:hover,
.btnfos-2:active {
letter-spacing: 5px;
}
.btnfos-2:after,
.btnfos-2:before {
-webkit-backface-visibility: hidden;
backface-visibility: hidden;
border: 1px solid rgba(255, 255, 255, 0);
bottom: 0px;
content: " ";
display: block;
margin: 0 auto;
position: relative;
-webkit-transition: all 280ms ease-in-out;
transition: all 280ms ease-in-out;
width: 0;
}
.btnfos-2:hover:after,
.btnfos-2:hover:before {
-webkit-backface-visibility: hidden;
backface-visibility: hidden;
border-color: #fff;
-webkit-transition: width 350ms ease-in-out;
transition: width 350ms ease-in-out;
width: 70%;
}
.btnfos-2:hover:before {
bottom: auto;
top: 0;
width: 70%;
}

3. Style With Shadow

button hover effects flat
The HTML
<a class="btnfos btnfos-3" href="">Hover</a>
The CSS

* {
-moz-box-sizing: inherit;
box-sizing: inherit;
-webkit-transition-property: all;
transition-property: all;
-webkit-transition-duration: .6s;
transition-duration: .6s;
-webkit-transition-timing-function: ease;
transition-timing-function: ease;
}
html,
body {
-moz-box-sizing: border-box;
box-sizing: border-box;
height: 100%;
width: 100%;
}
body {
background: #3498db;
}
.btnfos {
color: #fff;
cursor: pointer;
display: block;
font-size: 16px;
font-weight: 400;
line-height: 45px;
max-width: 160px;
margin: 0 auto 2em;
position: relative;
text-transform: uppercase;
vertical-align: middle;
width: 100%;
text-align: center;
}
@media (min-width: 400px) {
.btnfos {
display: inline-block;
margin-right: 2.5em;
}
.btnfos:nth-of-type(even) {
margin-right: 0;
}
}
@media (min-width: 600px) {
.btnfos:nth-of-type(even) {
margin-right: 2.5em;
}
.btnfos:nth-of-type(5) {
margin-right: 0;
}
}
.btnfos-3 {
background: #3498db;
border: 1px solid white;
box-shadow: 0px 2px 0 white, 2px 4px 6px #eee;
font-weight: 900;
letter-spacing: 1px;
-webkit-transition: all 150ms linear;
transition: all 150ms linear;
}
.btnfos-3:hover {
background: #3498db;
border: 1px solid rgba(0, 0, 0, 0.05);
box-shadow: 1px 1px 2px rgba(255, 255, 255, 0.2);
color: #74e6e0;
text-decoration: none;
text-shadow: -1px -1px 0 #136a65;
-webkit-transition: all 250ms linear;
transition: all 250ms linear;
}

4. This is Very Awesome

button hover effects css

The HTML
<a class="btnfos btnfos-4" href="">Hover</a>
The CSS

* {
-moz-box-sizing: inherit;
box-sizing: inherit;
-webkit-transition-property: all;
transition-property: all;
-webkit-transition-duration: .6s;
transition-duration: .6s;
-webkit-transition-timing-function: ease;
transition-timing-function: ease;
}
html,
body {
-moz-box-sizing: border-box;
box-sizing: border-box;
height: 100%;
width: 100%;
}
body {
background: #3498db;
}
.btnfos {
color: #fff;
cursor: pointer;
display: block;
font-size: 16px;
font-weight: 400;
line-height: 45px;
max-width: 160px;
margin: 0 auto 2em;
position: relative;
text-transform: uppercase;
vertical-align: middle;
width: 100%;
text-align: center;
}
@media (min-width: 400px) {
.btnfos {
display: inline-block;
margin-right: 2.5em;
}
.btnfos:nth-of-type(even) {
margin-right: 0;
}
}
@media (min-width: 600px) {
.btnfos:nth-of-type(even) {
margin-right: 2.5em;
}
.btnfos:nth-of-type(5) {
margin-right: 0;
}
}
.btnfos-4 {
border: 1px solid;
overflow: hidden;
position: relative;
}
.btnfos-4 span {
z-index: 20;
}
.btnfos-4:after {
background: #fff;
content: "";
height: 155px;
left: -75px;
opacity: .2;
position: absolute;
top: -50px;
width: 50px;
-webkit-transition: all 550ms cubic-bezier(0.19, 1, 0.22, 1);
transition: all 550ms cubic-bezier(0.19, 1, 0.22, 1);
-webkit-transform: rotate(35deg);
-ms-transform: rotate(35deg);
transform: rotate(35deg);
z-index: -10;
}
.btnfos-4:hover:after {
left: 120%;
-webkit-transition: all 550ms cubic-bezier(0.19, 1, 0.22, 1);
transition: all 550ms cubic-bezier(0.19, 1, 0.22, 1);
}

5. Hover In Out !

button hover animation css


The HTML
<a class="btnfos btnfos-2" href="">Hover</a>
The CSS

* {
-moz-box-sizing: inherit;
box-sizing: inherit;
-webkit-transition-property: all;
transition-property: all;
-webkit-transition-duration: .6s;
transition-duration: .6s;
-webkit-transition-timing-function: ease;
transition-timing-function: ease;
}
html,
body {
-moz-box-sizing: border-box;
box-sizing: border-box;
height: 100%;
width: 100%;
}
body {
background: #3498db;
}
.btnfos {
color: #fff;
cursor: pointer;
display: block;
font-size: 16px;
font-weight: 400;
line-height: 45px;
max-width: 160px;
margin: 0 auto 2em;
position: relative;
text-transform: uppercase;
vertical-align: middle;
width: 100%;
text-align: center;
}
@media (min-width: 400px) {
.btnfos {
display: inline-block;
margin-right: 2.5em;
}
.btnfos:nth-of-type(even) {
margin-right: 0;
}
}
@media (min-width: 600px) {
.btnfos:nth-of-type(even) {
margin-right: 2.5em;
}
.btnfos:nth-of-type(5) {
margin-right: 0;
}
}
.btnfos-5 {
border: 0 solid;
box-shadow: inset 0 0 20px rgba(255, 255, 255, 0);
outline: 1px solid;
outline-color: rgba(255, 255, 255, 0);
outline-offset: 0px;
text-shadow: none;
-webkit-transition: all 1250ms cubic-bezier(0.19, 1, 0.22, 1);
transition: all 1250ms cubic-bezier(0.19, 1, 0.22, 1);
outline-color: rgba(255, 255, 255, 0.5);
outline-offset: 0px;
}
.btnfos-5:hover {
border: 1px solid;
box-shadow: inset 0 0 20px rgba(255, 255, 255, 0.5), 0 0 20px rgba(255, 255, 255, 0.2);
outline-offset: 15px;
outline-color: rgba(255, 255, 255, 0);
text-shadow: 1px 1px 2px #427388;
}

Wednesday, March 2, 2016

Bootstrap 3 Carousel Fade Effect


Fostrap - Create a slide show is a tough job for the new learn CSS because it essentially Slide Show made with Javascript. For me, Javascript is a programming language that is a bit complicated, so for creating action such as the slide show is also difficult.

But after I learned Bootstrap makes a slide show is a very easy job.

And now, Fostrap will be giving a Tutorial to make a carousel bootstrap by adding more wonderful effect fadein & out


Lets Make Bootstrap Carousel Effect FadeIn and FadeOut

1. Copy The HTML Below


<link href="https://maxcdn.bootstrapcdn.com/bootstrap/3.3.1/css/bootstrap.min.css" rel="stylesheet" type="text/css"/>
</link>
<link href="https://fonts.googleapis.com/css?family=Lato" rel="stylesheet" type="text/css"/>
</link>
<div class="carousel slide carousel-fade" data-ride="carousel" id="carouselFade">
<!--
Wrapper for slides
-->
<br />
<div class="carousel-inner" role="listbox">
<div class="item active">
    <div class="carousel-caption">
        <h3>
            First slide label
        </h3>
        Praesent commodo cursus magna, vel scelerisque nisl consectetur.
    </div>
</div>
<div class="item">
    <div class="carousel-caption">
        <h3>
            Second slide label
        </h3>
        Praesent commodo cursus magna, vel scelerisque nisl consectetur.
    </div>
</div>
<div class="item">
    <div class="carousel-caption">
        <h3>
            Third slide label
        </h3>
        Praesent commodo cursus magna, vel scelerisque nisl consectetur.
    </div>
</div>
</div>
<!--
Controls
-->
<a class="left carousel-control" data-slide="prev" href="https://www.blogger.com/blogger.g?blogID=8927574837029310736#carouselFade" role="button">
<span aria-hidden="true" class="glyphicon glyphicon-chevron-left">
</span>
<span class="sr-only">
    Previous
</span>
</a>
<a class="right carousel-control" data-slide="next" href="https://www.blogger.com/blogger.g?blogID=8927574837029310736#carouselFade" role="button">
<span aria-hidden="true" class="glyphicon glyphicon-chevron-right">
</span>
<span class="sr-only">
    Next
</span>
</a>
</div>
<!--
jQuery (necessary for Bootstrap's JavaScript plugins)
-->
<script src="https://ajax.googleapis.com/ajax/libs/jquery/1.11.1/jquery.min.js">
</script>
<!--
Include all compiled plugins (below), or include individual files as needed
-->
<script src="https://maxcdn.bootstrapcdn.com/bootstrap/3.3.1/js/bootstrap.min.js">
</script>

2. Copy The CSS Below


.carousel-fade .carousel-inner .item {
opacity: 0;
transition-property: opacity;
}
.carousel-fade .carousel-inner .active {
opacity: 1;
}
.carousel-fade .carousel-inner .active.left,
.carousel-fade .carousel-inner .active.right {
left: 0;
opacity: 0;
z-index: 1;
}
.carousel-fade .carousel-inner .next.left,
.carousel-fade .carousel-inner .prev.right {
opacity: 1;
}
.carousel-fade .carousel-control {
z-index: 2;
}
@media all and (transform-3d), (-webkit-transform-3d) {
.carousel-fade .carousel-inner > .item.next,
.carousel-fade .carousel-inner > .item.active.right {
opacity: 0;
-webkit-transform: translate3d(0, 0, 0);
transform: translate3d(0, 0, 0);
}
.carousel-fade .carousel-inner > .item.prev,
.carousel-fade .carousel-inner > .item.active.left {
opacity: 0;
-webkit-transform: translate3d(0, 0, 0);
transform: translate3d(0, 0, 0);
}
.carousel-fade .carousel-inner > .item.next.left,
.carousel-fade .carousel-inner > .item.prev.right,
.carousel-fade .carousel-inner > .item.active {
opacity: 1;
-webkit-transform: translate3d(0, 0, 0);
transform: translate3d(0, 0, 0);
}
}
.carousel-caption {
text-shadow: 0 1px 4px rgba(0,0,0,.9);
font-size:17px
}
.carousel-caption h3 {
font-size: 30px;
font-family: 'Lato', sans-serif;
}
html,
body,
.carousel,
.carousel-inner,
.carousel-inner .item {
height: 100%;
}
.item:nth-child(1) {
background: url('https://snap-photos.s3.amazonaws.com/img-thumbs/960w/HZZKGVVJ6I.jpg');
background-size: cover;
background-position: center center;
background-repeat: no-repeat;
}
.item:nth-child(2) {
background: url('https://snap-photos.s3.amazonaws.com/img-thumbs/960w/D2ROMCUEIV.jpg');
background-size: cover;
background-position: center center;
background-repeat: no-repeat;
}
.item:nth-child(3) {
background: url('https://snap-photos.s3.amazonaws.com/img-thumbs/960w/PU9HHZB5QW.jpg');
background-size: cover;
background-position: center center;
background-repeat: no-repeat;
}

3. Copy The Javascript Below


$('#carouselFade').carousel();


Note
: If you want to change the background, just edit The CSS, edit in :

.item:nth-child(1) {
background: url('-----------Your Background Image-----------');
background-size: cover;
background-position: center center;
background-repeat: no-repeat;
}
.item:nth-child(2) {
background: url('-----------Your Background Image-----------');
background-size: cover;
background-position: center center;
background-repeat: no-repeat;
}
.item:nth-child(3) {
background: url('-----------Your Background Image-----------');
background-size: cover;
background-position: center center;
background-repeat: no-repeat;
}